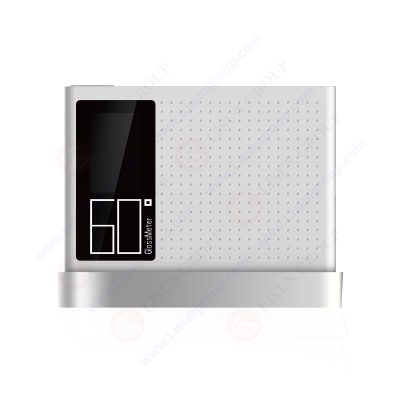
Gloss measurement is conducted using a gloss meter, also known as a glossometer, which is an instrument designed to measure the surface specular reflectance (gloss). Gloss is determined by projecting a beam of light onto a surface with fixed intensity and angle and measuring the amount of reflected light at an equal but opposite angle.
The method of gloss measurement is based on the principles of light reflection and refraction. When light rays enter a surface, some of the light is reflected back, known as specular reflection. A gloss meter determines gloss by measuring the intensity and angle of this reflected light. Typically, specific light sources and detectors are used in gloss meters to ensure accurate reflection data within a certain angle range.
A gloss meter is an instrument used to measure surface glossiness, and the selection of the instrument depends on the type of surface being measured. Different geometries are suitable for different types of surfaces.
For non-metallic materials such as coatings and plastics, gloss measurement is significantly influenced by the angle of illumination. As the illumination angle increases, the amount of reflected light also increases, as some light penetrates the surface material and is absorbed into it based on its color or diffusely scattered. Therefore, for these materials, gloss meters typically employ different angles to obtain accurate measurement results.
In contrast, metals have higher reflectivity, resulting in less angular dependence. Therefore, for metal surfaces, gloss meters can use fewer angles and usually achieve relatively stable measurement results.
Numerous international technical standards are available to define the methods and specifications for different types of gloss meters, including those for paints, ceramics, paper, metals, and plastics. In many industries, gloss meters are widely used for quality control to ensure consistency in the manufacturing process. The automotive industry is one of the major users of gloss meters, with applications ranging from factory workshops to repair workshops.
The measurement angle refers to the angle between the incident light and the reflected light. Typically, three standard measurement angles (20°, 60°, and 85°) are specified to cover most industrial coating applications. For example, if the measurement result at a 60° angle exceeds 70 GU, it may be necessary to change the measurement angle to 20° to improve measurement accuracy. There are three types of gloss meters on the market: single-angle instruments at 60°, combination instruments at 20° and 60°, and instruments that combine angles of 20°, 60°, and 85°.
In addition to these three angles, two other angles are used to measure other types of materials. For example, ceramics, films, textiles, and anodized aluminum are typically measured at a 45° angle, while paper is measured at a 75° angle. These different angle selections are applicable to different types of surfaces to ensure accurate measurement of their glossiness.
AGM-500PRO_Gloss Meter
Calibration is a crucial step in ensuring that gloss meters exhibit linearity throughout their measurement range. Manufacturers typically calibrate gloss meters to a set of main calibration tiles traceable to organizations such as BAM Federal Institute for Materials Research and Testing or NIST.
To maintain the performance and linearity of gloss meters, it is recommended to use checking standard tiles. These standard tiles assign gloss unit values for each measurement angle, which can also be traced back to national standards such as BAM Federal Institute for Materials Research and Testing or NIST. Gloss meters are calibrated based on checking standards commonly referred to as “calibration tiles” or “calibration standards”. The calibration interval depends on the frequency of use and operating conditions of the gloss meter.
It is important to note that even under good conditions, standard calibration tiles may become contaminated over time, resulting in changes in gloss unit values. Standard tiles used under actual working conditions may require regular recalibration or inspection by manufacturers or professionals.
According to international standards, the tiles are calibrated and traceable artificial products, not gloss meters. However, manufacturers typically recommend checking the instrument to determine if its calibration frequency meets the requirements of the operating conditions. The shortest interval for recalibration should be one year, and if calibration standards are found to be severely scratched or damaged at any time, immediate recalibration or replacement is necessary to ensure accurate readings of the gloss meter.
Gloss meters are widely used in many industries, from paper mills to automotive manufacturing, with manufacturers and users utilizing them. Specific applications include:
Paint and coating industry
Powder coating manufacturing
Additive production
Ink production
Plastic processing
Wood coating
Yacht manufacturing
Automotive manufacturing and refinishing
Aerospace industry
Stone and metal polishing
Glass manufacturing
Consumer electronics manufacturing
Anodizing metal production
Gloss meters play a crucial role in these industries, helping manufacturers and users ensure that the surface glossiness of products meets requirements and providing important tools for quality control and quality assurance.
https://www.lisungroup.com/news/technology-news/understanding-gloss-meters-principles-and-applications.html
.jpg)
.jpg)
Comments
Post a Comment